Categories
Blog

The 5 best international SIM cards for traveling in Europe in 2024

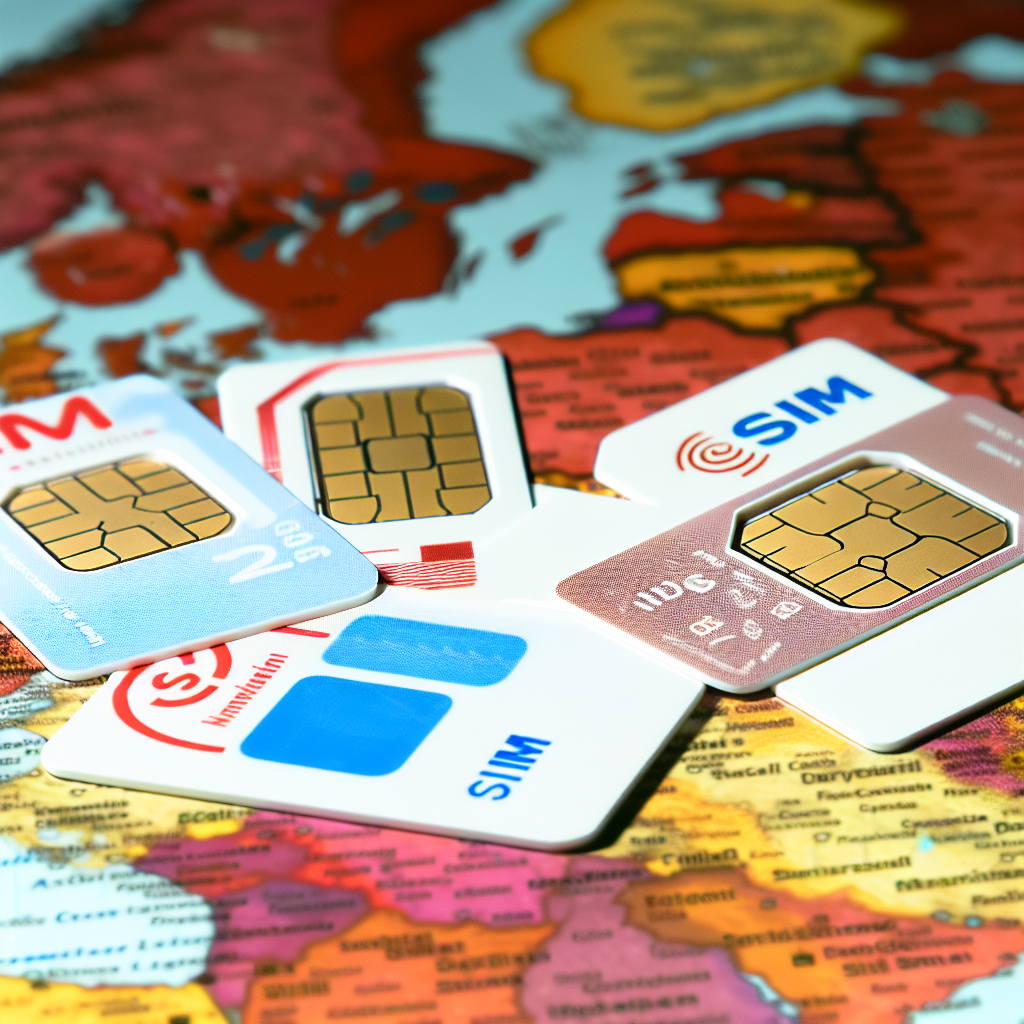
Traveling in Europe is an exciting adventure, but staying connected while abroad can sometimes be a challenge. Thankfully, international SIM cards are a convenient solution for travelers looking to stay in touch without breaking the bank. In 2024, there are several options available for those exploring the diverse countries of Europe. Here are the five best international SIM cards for traveling in Europe:

1. Orange Holiday Europe

Orange Holiday Europe SIM card is a popular choice for travelers visiting multiple countries in Europe. This SIM card offers 20GB of data, along with 120 minutes of international calls and 1,000 texts. With coverage in 30 European countries, including France, Spain, Italy, and Germany, Orange Holiday Europe is a convenient option for those on the go.

2. Three UK

Three UK’s international SIM card is another great option for travelers in Europe. With the “Feel At Home” feature, customers can use their allowance in 71 destinations worldwide, including many European countries. Three UK offers competitive rates for data, calls, and texts, making it a convenient choice for budget-conscious travelers.

3. Vodafone International

Vodafone International SIM card is ideal for travelers who want flexibility and reliable coverage in Europe. With prepaid packages that include data, calls, and texts, Vodafone International offers customizable options to fit your specific travel needs. This SIM card is valid in over 40 countries, making it a versatile choice for those exploring different parts of Europe.

4. Lycamobile Europe Plus

Lycamobile Europe Plus SIM card is a popular choice for travelers looking for affordable rates and reliable coverage in Europe. With competitive data packages and low-cost international calls, Lycamobile Europe Plus offers great value for money. This SIM card is valid in 23 European countries, including the UK, France, and Spain, making it a convenient option for those traveling to popular destinations.

5. EE Europe SIM

EE Europe SIM card is a reliable option for travelers seeking seamless connectivity in Europe. With EE’s extensive coverage and fast 4G network, customers can stay connected across 48 European destinations. The SIM card offers generous data packages and competitive rates for calls and texts, making it a convenient choice for both leisure and business travelers.

Categories
Blog

5 ways of sending money internationally

When sending money internationally, there are several options available that cater to different needs and preferences. Whether you need to send money to family members overseas, pay for goods or services, or support a cause abroad, here are 5 popular ways to transfer funds internationally:

1. Bank Transfers:

One of the most common methods of sending money internationally is through a bank transfer. You can transfer funds from your bank account to another bank account in a different country. While this method is secure and reliable, it can be costly due to high fees and less favorable exchange rates. It is best suited for large transfers where speed is not the primary concern.

2. Money Transfer Services:

Money transfer services, such as Western Union, MoneyGram, and TransferWise, provide a convenient way to send money internationally. These services offer options for cash pickups, transfers to bank accounts, and mobile wallet deposits. While they may have higher fees than other methods, they are known for their speed and wide availability around the globe.

3. Online Payment Platforms:

With the rise of e-commerce, online payment platforms like PayPal, Skrill, and Payoneer have gained popularity for international money transfers. These platforms allow you to send money to friends, family, or vendors by simply knowing their email address. While fees may vary, these services are often quick and user-friendly, making them a preferred choice for smaller transfers.

4. Cryptocurrency Transfers:

For those looking for a more modern and potentially cost-effective way to send money internationally, cryptocurrency transfers are an option. Platforms like Bitcoin, Ethereum, and Ripple allow users to send digital currencies across borders quickly and with lower fees compared to traditional methods. However, it is crucial to consider the volatility and regulations surrounding cryptocurrencies before making transfers.

5. International Money Orders:

International money orders are a secure way to send funds overseas, especially for those who prefer paper-based transactions. You can purchase a money order from a post office or financial institution and send it to the recipient via mail. While this method may take longer than other options, it is a reliable choice for those who do not have access to online banking or prefer physical forms of payment.

When choosing a method to send money internationally, consider factors such as speed, cost, convenience, and security to select the option that best meets your needs. Each method has its pros and cons, so it is essential to compare them based on your specific requirements before making a decision.

Categories
Blog

How to add money to your PayPal account in 5 different ways

How to add money to your PayPal account in 5 different ways

PayPal has become a widely used and trusted platform for online transactions. Whether you use it for shopping, sending money to friends, or receiving payments for your business, having funds in your PayPal account is essential. But what if your PayPal balance is running low and you need to add money? Here are 5 different methods to add funds to your PayPal account:

1. Linking a Bank Account

One of the most common ways to add money to your PayPal account is by linking it to your bank account. To do this, log in to your PayPal account and navigate to the “Wallet” tab. From there, select “Link a bank account” and follow the prompts to input your bank account information. Once linked, you can transfer funds from your bank account to your PayPal account easily. Keep in mind that it may take a few business days for the transfer to complete.

2. Using a Debit or Credit Card

If you prefer to use a debit or credit card to add funds to your PayPal account, you can do so by going to the “Wallet” tab and selecting “Link a card.” Enter your card details and confirm the card’s linkage to your account. After the card is linked, you can make instant transfers from your card to your PayPal balance. However, be aware that PayPal may charge a small fee for this service.

3. Receiving Payments

If you use PayPal for selling goods or services, you can add funds to your account by receiving payments from customers. When a customer pays you through PayPal, the funds will be credited to your account balance. You can then use these funds for purchases or transfer them to your linked bank account. Make sure to send accurate invoices to ensure a smooth payment process.

4. PayPal Cash

If you prefer to use cash to add money to your PayPal account, you can do so by using PayPal Cash. Visit a participating retailer, such as CVS or Rite Aid, and request to add cash to your account. The cashier will provide you with a barcode that you can present to add the desired amount to your PayPal balance. This method is convenient for those who prefer to use cash for online transactions.

5. PayPal Balance Transfer

Another way to add money to your PayPal account is by transferring funds from another PayPal user. If you have a friend or family member who also uses PayPal, they can send money to your PayPal account. This method is quick and easy, as the transfer is usually instant. Just make sure to verify the sender’s information before accepting the transfer.

With these 5 different methods, you can easily add money to your PayPal account and continue using it for your online transactions. Whether you prefer linking a bank account, using a debit/credit card, receiving payments, using PayPal Cash, or transferring funds from another user, PayPal offers a variety of options to meet your needs.

Categories
Blog

Western Union tracking with MTCN in 5 steps

Introduction

When sending money through Western Union, one of the key components you will need to track your transfer is the Money Transfer Control Number (MTCN). This unique tracking number is provided to the sender after initiating the transfer and enables both the sender and recipient to track the status of the transaction.

Tracking a Western Union transfer using the MTCN is a quick and efficient process that can provide peace of mind to both parties involved. In this guide, we will walk you through the steps to track a Western Union transfer using the MTCN in 5 easy steps.

Step 1: Obtain the MTCN

The first step in tracking a Western Union transfer is to obtain the Money Transfer Control Number (MTCN) from the sender. The MTCN is a unique reference number assigned to every money transfer made through Western Union. The sender will receive the MTCN after completing the transaction, and it is crucial to have this number to track the transfer.

Make sure to ask the sender for the MTCN once the transaction is complete. Without this number, it will be impossible to track the transfer using Western Union’s online tracking system.

Step 2: Visit the Western Union Website

Once you have the MTCN in hand, the next step is to visit the Western Union website. On the Western Union homepage, locate the ‘Track Transfer’ option. This option is usually found in the menu or at the top of the page. Click on ‘Track Transfer’ to proceed to the tracking page.

Alternatively, you can directly access the tracking page by entering the following URL in your web browser: https://www.westernunion.com/track-transfer

Step 3: Enter the Required Information

On the tracking page, you will be prompted to enter the required information to track your transfer. The information typically includes the MTCN, the sender’s name, the receiver’s country, and the transfer amount. Make sure to enter the MTCN accurately to avoid any errors in tracking the transfer.

Once you have entered all the necessary information, click on the ‘Track Transfer’ button to proceed with the tracking process.

Step 4: Track the Transfer

After submitting the required information, Western Union’s system will process your request and display the current status of the transfer. You will be able to see whether the money has been sent, picked up, or is still in transit. Additionally, you may receive updates on any issues or delays with the transfer.

It is essential to monitor the tracking information regularly to stay informed about the progress of the transfer. If you have any concerns or questions about the status of the transfer, you can contact Western Union’s customer service for assistance.

Step 5: Receive Confirmation

Once you have tracked the transfer using the MTCN, you will receive confirmation of the transaction status. If the money has been successfully transferred and picked up by the recipient, the tracking information will indicate that the transaction is complete.

Make sure to keep a record of the tracking details for your reference. If you encounter any issues or discrepancies during the tracking process, contact Western Union’s customer service for further assistance.

Tracking a Western Union transfer using the MTCN is a straightforward process that provides transparency and security for both the sender and recipient. By following these 5 simple steps, you can easily track your transfer and ensure that the money reaches its intended destination without any hitches.

Categories
Blog

Zelle vs Venmo – What’s the difference, which is better?

Zelle vs Venmo – What’s the difference, which is better?

When it comes to peer-to-peer payment platforms, Zelle and Venmo are two popular choices that offer users a convenient way to send and receive money. However, there are some key differences between the two services that may influence which one is the better option for you. In this article, we will compare Zelle and Venmo in terms of their features, ease of use, security, fees, and more to help you decide which platform is the right fit for your needs.

Features

Zelle is a digital payment network that is built into the mobile banking apps of participating banks and credit unions. This means that if your bank is a member of the Zelle network, you can easily send money to friends and family directly from your bank account. Transactions are typically processed within minutes, making Zelle a fast and convenient option for transferring funds.

Venmo, on the other hand, is a standalone app that is owned by PayPal. In addition to sending and receiving money, Venmo also allows users to split expenses, make purchases from select merchants, and even pay in-app with authorized merchants. One of Venmo’s most popular features is its social feed, which allows users to see and comment on their friends’ transactions.

Ease of Use

Both Zelle and Venmo are designed to be user-friendly and intuitive, with simple interfaces that make it easy to send and receive money. Zelle’s integration with banking apps makes it a seamless option for users who prefer to keep all of their financial transactions in one place. Venmo’s social feed and additional features can add a fun and interactive element to the payment process, but some users may find it cluttered or unnecessary.

Security

When it comes to security, both Zelle and Venmo offer encryption and other measures to protect users’ personal and financial information. Zelle’s integration with banks adds an extra layer of security, as transactions are conducted within the existing framework of the banking system. Venmo’s status as a standalone app may raise concerns for some users, but the platform also provides security features such as PIN protection and the ability to set privacy controls on transactions.

Fees

One of the main differences between Zelle and Venmo is their fee structures. Zelle does not charge any fees for standard bank transfers, making it an attractive option for users who want to send money without incurring extra costs. Venmo, on the other hand, charges a 3% fee for credit card transactions, as well as a fee for instant transfers.

Availability

Zelle is available to customers of participating banks and credit unions, which limits its accessibility compared to Venmo. Venmo is available to anyone with a U.S. bank account or debit card, making it a more versatile option for users who do not have accounts at Zelle-affiliated institutions.

In conclusion, the choice between Zelle and Venmo ultimately depends on your personal preferences and needs. If you prioritize speed and convenience, Zelle may be the better option due to its direct integration with banking apps and quick transfer times. On the other hand, if you value additional features such as the social feed, split expenses, and in-app purchases, Venmo may be the right choice for you. Consider factors such as security, fees, and availability when deciding which platform is the best fit for your financial needs.

Categories
Blog

How to send money from Chime to Cash App


Categories
Blog

Cash App Card: How to order, activate and use it?

Ordering Your Cash App Card

Ordering a Cash App Card is simple and can be done directly through the Cash App mobile application. Here’s how you can request your own Cash App Card:

  1. Open the Cash App on your mobile device.
  2. Tap on the Cash Card icon located at the bottom of the screen.
  3. Click on “Get Cash Card” and proceed to follow the on-screen instructions.
  4. You will need to customize your Cash Card by selecting the color you prefer and adding your signature or custom text.
  5. Once you have reviewed and confirmed the details, your Cash App Card will be ordered and shipped to your registered address.

Activating Your Cash App Card

After receiving your Cash App Card in the mail, you will need to activate it before you can start using it for transactions. Follow these steps to activate your Cash App Card:

  1. Open the Cash App on your mobile device.
  2. Tap on the Cash Card icon at the bottom of the screen.
  3. Select “Activate Cash Card” and then use your mobile device’s camera to scan the QR code found on your new Cash App Card.
  4. Once the QR code is scanned successfully, your Cash App Card will be activated and ready for use.

Using Your Cash App Card

Now that your Cash App Card is activated, you can start using it to make purchases in-store and online, withdraw cash from ATMs, and more. Here are some tips on how to use your Cash App Card effectively:

  • In-store Purchases: Simply swipe your Cash App Card at the point of sale terminal and follow the prompts to complete your transaction. You can also use it for contactless payments where available.
  • Online Purchases: Enter your Cash App Card details, including the card number, expiration date, and CVV, just like you would with any other debit or credit card.
  • ATM Withdrawals: You can use your Cash App Card to withdraw cash from ATMs. Keep in mind that there may be fees associated with cash withdrawals, so check the fee schedule in the Cash App.
  • Adding Funds: You can add funds to your Cash App Card by linking a bank account or debit card to your Cash App account. Once funds are added, you can use your Cash App Card to make purchases or withdraw cash.
  • Monitoring Transactions: Keep track of your spending by monitoring transactions made with your Cash App Card directly within the Cash App. You can also set up notifications for each transaction to stay informed.

By following these steps and tips, you can easily order, activate, and start using your Cash App Card for all your financial needs.

Categories
Blog

What is Apple Pay and how does it work?

Introduction to Apple Pay

Apple Pay is a mobile payment and digital wallet service provided by Apple Inc. It allows users to make payments in person, in iOS apps, and on the web using supported Apple devices. Launched in 2014, Apple Pay has gained popularity for its convenience, security, and seamless integration with Apple’s ecosystem.

Apple Pay utilizes Near Field Communication (NFC) technology to enable contactless payments through iPhones, Apple Watches, iPads, and Macs. By storing credit, debit, and digital cards securely in the Wallet app, users can make purchases by simply holding their device near a supported payment terminal.

How Does Apple Pay Work?

Apple Pay works by securely storing card information on your device and using tokenization to process payments without revealing your actual card details to the merchant. Here’s a step-by-step guide on how Apple Pay works:

1. Adding Cards to Apple Pay

To start using Apple Pay, you need to add your credit or debit cards to the Wallet app on your iPhone or iPad. You can either manually enter the card details or use the device’s camera to capture the card information. Some banks also support adding cards through their mobile banking apps.

2. Making Payments In-Store

When making an in-store purchase, look for the contactless payment symbol or NFC reader at the checkout terminal. Hold your iPhone or Apple Watch near the terminal while authenticating with Face ID, Touch ID, or your device passcode to authorize the payment. The transaction is processed securely without sharing your card information.

3. Making Payments in Apps and Online

Apple Pay can also be used to make purchases within various supported apps and websites on your iPhone, iPad, or Mac. Simply select Apple Pay as the payment method, authenticate using Face ID, Touch ID, or your device passcode, and confirm the payment. This streamlined checkout process eliminates the need to enter card details manually.

4. Sending and Receiving Money

In addition to making payments, Apple Pay allows users to send and receive money through iMessage or Siri. By linking a debit card to Apple Pay Cash, you can quickly transfer funds to friends and family members. The money received can be used for purchases or transferred to your bank account.

5. Security and Privacy

One of the key advantages of Apple Pay is its emphasis on security and privacy. Each transaction is authorized with a one-time unique dynamic security code, and your actual card details are never shared with merchants. Additionally, biometric authentication adds an extra layer of security to prevent unauthorized use of your device for payments.

Compatibility and Availability

Apple Pay is available in multiple countries and regions, with support from numerous banks, credit card issuers, and retailers. The service is compatible with a wide range of Apple devices, including:

  • iPhone (iPhone SE, iPhone 6 and later)
  • Apple Watch
  • iPad (iPad Pro, iPad Air, iPad, and iPad mini)
  • Mac (with Touch ID or Apple Pay enabled iPhone or Apple Watch for authentication)

Before using Apple Pay, ensure that your device is running the latest version of iOS, watchOS, or macOS and that your bank or card issuer supports the service.

Conclusion

In conclusion, Apple Pay is a convenient, secure, and innovative way to make payments using your Apple devices. Whether you’re shopping in-store, making purchases in apps, or sending money to friends, Apple Pay simplifies the payment process while safeguarding your financial information. With its widespread availability and growing support from banks and retailers, Apple Pay continues to shape the future of mobile payments and digital wallets.

Categories
Blog

How to transfer money from Apple Pay to Cash App?

Transferring Money from Apple Pay to Cash App

When it comes to transferring money between different payment platforms, it’s important to understand the processes involved to ensure a smooth transaction. If you’re looking to move funds from your Apple Pay account to your Cash App account, there are a few steps you can take to make this transfer successfully. In this guide, we’ll walk you through the process of transferring money from Apple Pay to Cash App.

Using a Linked Bank Account

One of the most common methods to transfer money from Apple Pay to Cash App is by using a linked bank account. By adding the same bank account to both your Apple Pay and Cash App profiles, you can facilitate the transfer of funds seamlessly. Here’s how you can do it:

  1. Open your Apple Pay app on your device.
  2. Locate the “Wallet & Apple Pay” section and select it.
  3. Choose the option to add a bank account and follow the on-screen instructions to link your bank account to Apple Pay.
  4. Next, open your Cash App and navigate to the balance tab.
  5. Select the option to add cash and enter the amount you wish to transfer from Apple Pay.
  6. Follow the prompts to link your bank account to Cash App.
  7. Once both accounts are linked, you can easily transfer money from Apple Pay to Cash App by selecting the amount and confirming the transaction.

Using a Debit Card

If you prefer to use a debit card to transfer money from Apple Pay to Cash App, you can also do so. Many users find this method convenient and efficient. Here’s how you can transfer funds using a debit card:

  1. Open your Apple Pay app on your device.
  2. Access the “Wallet & Apple Pay” section and select it.
  3. Choose the option to add a debit card and follow the on-screen instructions to link your card to Apple Pay.
  4. Launch your Cash App and go to the balance tab.
  5. Click on the option to add cash and enter the desired amount for transfer from Apple Pay.
  6. Link your debit card to Cash App by following the provided steps.
  7. Once both accounts are connected, you can transfer money from Apple Pay to Cash App using your debit card with ease.

Transferring from Apple Pay Cash Card

If you have a balance on your Apple Pay Cash Card and wish to move it to your Cash App account, you can do so directly within the Apple Pay app. Follow these steps to transfer money from your Apple Pay Cash Card to Cash App:

  1. Open the Apple Pay app on your device.
  2. Go to the “Wallet & Apple Pay” section and choose your Apple Pay Cash Card.
  3. Select the option to transfer the balance and enter the amount you want to send to Cash App.
  4. Verify the transfer details and confirm the transaction.
  5. Once the transfer is complete, the funds should reflect in your Cash App account.

By following these steps, you can easily transfer money from your Apple Pay account to your Cash App account using various methods. Whether you prefer using a linked bank account, a debit card, or transferring from your Apple Pay Cash Card directly, the process is straightforward and convenient.

Categories
Blog

How to delete your PayPal account in 5 easy steps

**

How to Delete Your PayPal Account in 5 Easy Steps

**

**

Introduction

**

PayPal is a popular online payment platform used by millions of people around the world. However, there may come a time when you no longer want or need your PayPal account. If you’ve decided to delete your PayPal account, you’ll be glad to know that the process is relatively straightforward. In this guide, we will walk you through the steps to deactivate and close your PayPal account permanently.

**

Step 1: Log in to Your PayPal Account

**

The first step to deleting your PayPal account is to log in to your account on the PayPal website. Enter your email address and password to access your account dashboard.

**

Step 2: Navigate to Account Settings

**

Once you are logged in, look for the settings icon or link on the PayPal dashboard. Click on it to access your account settings. From there, navigate to the “Account Settings” or “Profile” section.

**

Step 3: Close Your Account**

In the account settings or profile section, look for an option to close your account. PayPal may have different wording for this option, such as “Close Account” or “Deactivate Account.” Click on this option to proceed with closing your account.

**

Step 4: Confirm Your Decision**

PayPal will likely ask you to confirm your decision to close your account. You may need to provide a reason for why you are closing your account. Follow the on-screen prompts to complete the closure process.

**

Step 5: Check for Confirmation**

Once you have confirmed the closure of your account, PayPal will process your request. You may receive a confirmation email from PayPal stating that your account has been closed. Be sure to check your email to confirm the closure of your PayPal account.

**

Conclusion

**

Deleting your PayPal account is a simple process that can be completed in just a few easy steps. By following the steps outlined in this guide, you can deactivate and close your PayPal account permanently. Remember to withdraw any remaining balance in your account before closing it, and update any payment methods linked to your account. If you ever decide to rejoin PayPal in the future, you can always create a new account.